One of the simple and effective feature of ViSit Anywhere, is the ability to sample locations and use that location in your daily work (outside of ViSit Anywhere). This feature was originally implemented as a view editor in the GT version of ViSit Anywhere, but we have decided that it was useful enough to add to the MicroStation version also.
Recall that a view editor is one that temporarily suspends the current editor allows you to manipulate the view. When you have finished, simply press the [ESC] key to return to the current editor. Other view editors include the controls to zoom, pan and measure.
Previously the location of the control to configure the sample location editor was found at the group trigger button of the View > Navigation group in the ViSit Anywhere ribbon in the GT version (it was not available in the MicroStation version).
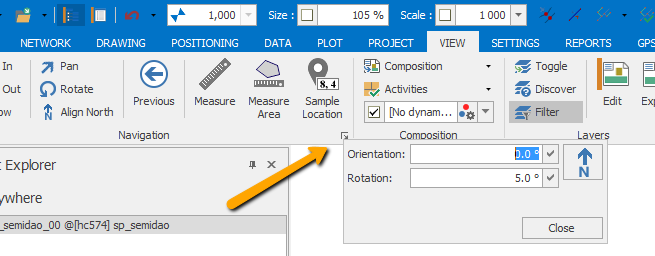
Note that in the GT version, the sample location editor button can still be found in the View > Navigation group (this group does not exist in MicroStation, as MicroStation built-in tools are used for the same purposes). Now the group trigger button at View > Navigation only provides configuration for view orientation. The view orientation remains a GT CAD engine feature, while the Sample Location feature is now a cross-CAD engine feature. The editor button and the configuration control are now located in the Settings > Display group.
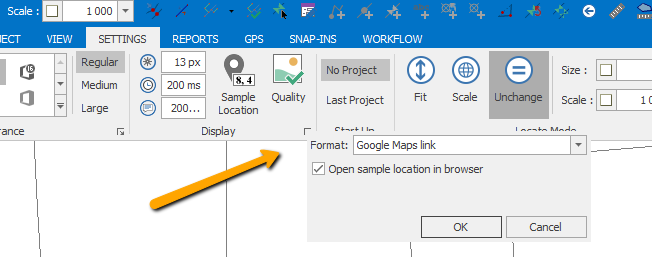
The same control can now be found in the MicroStation version of ViSit Anywhere also.
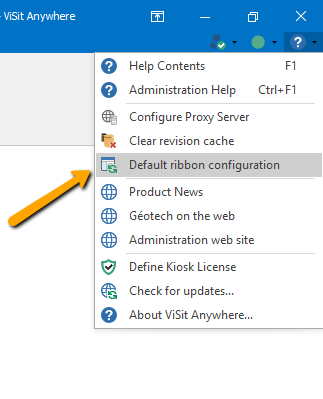
In order to see the new functionality it is necessary to refresh the default ribbon configuration either by using the help menu item (shown below) or by using the Project > Support > Default ribbon configuration item.
Now that our ribbon control has been configured with the new items, we can start to look at the new custom sample location actions.
Custom Sample Location Actions
In order fully exploit the potential of the sample location feature of ViSit Anywhere, we have implemented a new SampleLocationAction object. This feature will be available in the next version of ViSit Anywhere (16.3.2). This feature provides a new object that contains a reference to a naming function and an action function. The idea is that we can add a reference to the object in the sample location configuration control and then, if the action has been selected, execute the function when the user samples a location. The idea here is to allow the user to write functions to perform customer actions when a point is samples (rather than relying on the default actions provided by Géotech).
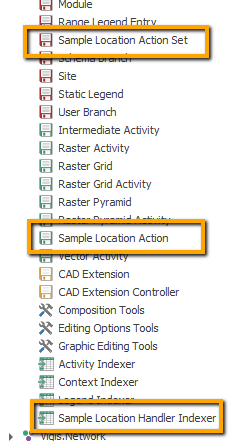
This framework requires a few new objects, that can be discovered in ViSit Anywhere. These are related to the graphic information in ViSit Anywhere and are thus located in the Kernel assembly. Simply, open the Types branch of the ViSit Anywhere project explorer and integrate the types Sample Location Handler Indexer, Sample Location Action Set and Sample Location Action (as shown below). Make sure to integrate the types in the order described.
Next, if we re-open our project, we are ready to start using custom location sample handlers. These handlers will live either in the User branch of the project explorer (where they will not be shared with other users) or in the Schema branch in a Module. I am going to define something in the schema to allow my new handler to be shared with other users. The first thing I will do is create a special-purpose Module to hold my custom actions (let's call it Actions). Then I am going to create a Function Set and a Sample Location Action Set to hold my objects.
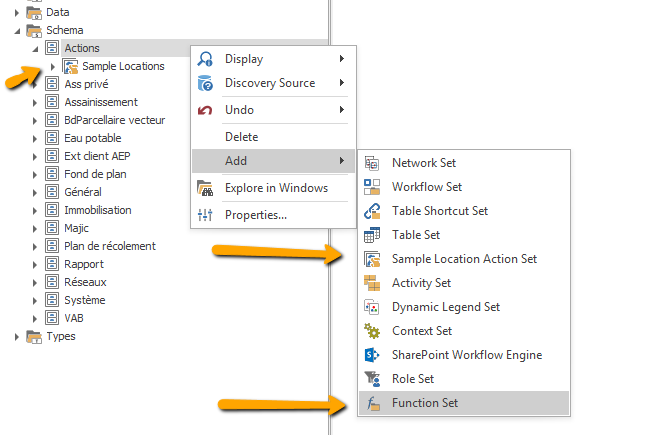
Notice we can just use the Add context menu item on Module to add the sets. Both sets are special-purpose collections that help us organize our objects.
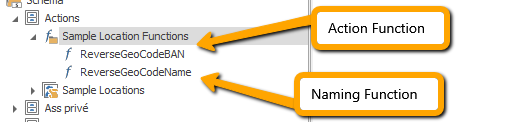
In this blog, I will step you through the creation of the new custom sample location action, but I will save the function implementations for another blog entry (bear with me). In my example, I want to create a custom action that will take a sampled location, and request the closest address from the French national address database (see this link). The first step is to implement two Functions, a naming function and an action function.
The naming function provides the user interface text to show in the configuration dialog. The action function will received the sampled location information and is expected to do something. The returned value of the naming function is the actual user interface text, while the returned value of the action function is ignored. This means that the action must cause something to happen as a side-effect of execution (typically load a URL, launch an application or copy some text to the clipboard).
In my example I will create a reverse geo-code name and action function that will be used by my custom action. I create these functions using the Add menu item on the Function Set in the standard way (to be discussed in detail in an up-coming blog).
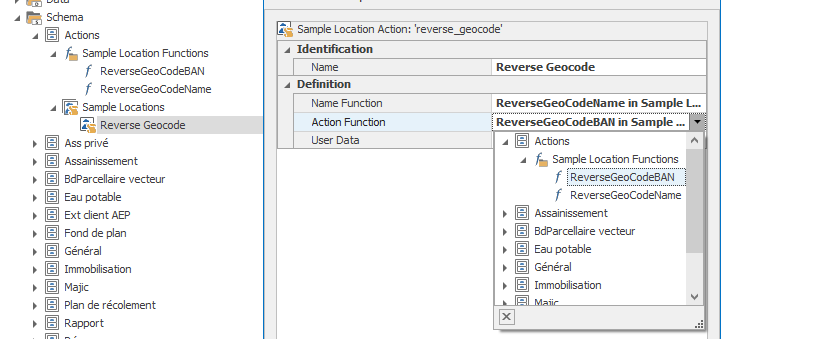
Now, I am ready to create my custom Sample Location Action. For this I just use the Add menu item on the Sample Location Action Set.
When we create the object, we will see that we must select a naming Function and an action Function. There is also a User Data field that can be used to send configurable data to the action Function. The user data allows us to create parameterized functions that can be reused by different applications. In my example, I do not need user data.
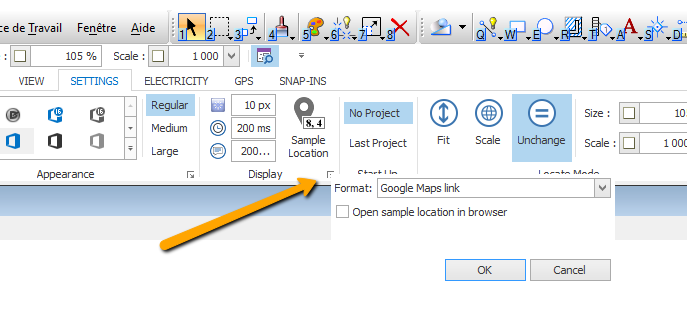
Now (assuming that I have implemented my functions), we can activate the tool. Note, in order to use the new custom action, it must be defined correctly. Use ViSit Anywhere check mode to ensure that the action has been completely defined. Next, go to the Sample Location Configuration tool at the group trigger button on Settings > Display. If everything goes according to plan, you should see your naming text in the list of available actions.
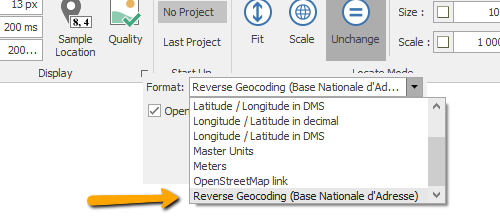
Notice, the user interface text returned by my naming function now shows up in the Format list and can be selected. We are now ready to go out to the web service and get an address, simply by activating the Sample Location editor. It is hard to show a value on the clipboard, but my function also adds a ViSit Anywhere log entry, so we can see the result in the user interface.

Again, I will be discussing the naming and action functions in another blog entry. But for now, we can see how easy it can be to get custom sample functionality in ViSit Anywhere.
Summary
In this article, I have introduced the notion of a sample location custom action. This feature will be appearing in ViSit Anywhere version 16.3.2 and will allow users to define and deploy custom location actions using ViSit Anywhere scripts. This provides another new and interesting way to integrate the information managed by ViSit Anywhere into your other work processes and add value to your spatial data.